3 Reasons Why Training Facebook Fans to "Get Notifications" and "All Updates" is Ineffective and Potentially Damaging


Late last night, I spotted a message from one of the industry's biggest social media marketers, Mari Smith, in my email inbox. In it, was a link to lengthy post that she had written on Facebook about how the site's EdgeRank algorithm measures a Page's content, and decides whether or not fans will see it. There was some useful insight there, but what intrigued me most was an emphasised pointer from Mari which reads:

 "IMPORTANT TIP: Train your fans to 1) select Get Notifications, 2) select Show in News Feed, and 3) select All Updates. [SEE SCREENSHOT in the comments below]."

And here is that screenshot:

The result of a fan following this request is that they will receive a notification every time you post on your Page and  that all of your Page's posts will appear in their News Feed.

Although I've been aware of this strategy for a long time, I have not used it myself, nor have I recommended it to the readers of my book, or any of my clients. I replied to Mari's post, thanking her for the EdgeRank information, but questioning the usefulness of asking fans to "Get Notifications., and requesting some clarification behind her enthusiasm for it. My comment has no reply to date (not truly unsurprising given the amount of replies that each of her posts generates). I'm a bit sad about that ,as I am a big fan of Mari, and enjoy discussing all manner of social media marketing issues.

Edit: Mari came across my blog post and was kind enough to reply. See the comments for her response.

From my own point of view, there are several reasons why I don't recommend Page owners asking their fans to "Get Notifications" and "All updates", including: 

1. It's pushy and can breed resentment 

 I see social media marketing as a way for brands to build strong and long-lasting relationships with their customers with a "slow and steady wins the race" filled with great content, enthusiasm, and selflessness. That said, however big your audience on Facebook, only a very small fraction will care to be notified of and exposed to every update that your Page makes.

Facebook users visit the site primarily to stay in touch with their friends and family. If they listened to the dozens of Pages who told them to "Get Notifications," their News Feed and notifications would soon be over-run, and they will quickly see certain Pages as becoming spammy, no matter how honest the Page's intentions. If they then go on to resent a Page's activity and start to hide or ignore it when it appears, then that cannot be a good thing.

2. Most fans will ignore it

Without paid promotion, the average Facebook post naturally reaches the News Feed of only a moderate percentage of your total fans at any one time - let's say 10-20%. We can knock off a good few percentage points for people who won't be online to see your post when it is published, and several more for people who will simply ignore it. We're then left with two types of people: those who will read the status but ignore the request, and the remainder who will read the status and take action. Considering how much time and money marketers spend on getting even a small percentage of an audience to perform an action (like entering their email address or clicking a link), the chances of a time-pressed Facebook fan clicking through to your Page and switching on "Get Notifications" and "All updates" is incredibly slim. Better would be to encourage real engagement through posting irresistible and imaginative content.

3. It makes no sense to mobile users

The latest figures show that there are a staggering 469 million daily active mobile users of Facebook worldwide. That number is approaching half of the 1.2 billion total Facebook members. If your "Get Notifications" request reaches the display of a fan of your Page viewing on their mobile device, even if they did want to opt in, they can't. The instructions work only for Facebook users on desktops, so all a mobile user sees a useless message spamming their News Feed. Will said fan remember your prompt and carry it out when they next sit down in front of their home computer? Very unlikely.

Conclusion

Don't get me wrong, I am all for discovering ways that Facebook Page owners can use to extend the reach of their content, but I am a strong advocate of generating this reach - in the main - as organically as possible. If someone is a dedicated and engaged fan of a brand on Facebook, chances are that they will see plenty of that brand's content in their News Feed naturally. And if they want to check to see if they have missed anything, they will either make the effort to visit the Page manually or  discover for themselves a way - like turning on "Get Notifications"  and "All updates" - to make sure they never miss that Page's content.

I am also not saying that Mari's "train your fans to Get Notifications" advice should never  be used by Page owners, but I do  feel that encouraging the strategy enthusiastically without balancing it out with some of the potential pitfalls like those I have listed above, could be seen as somewhat frivolous considering her position and influence within the social media marketing field.

  Are you a fan of using the "Get Notifications" strategy?  What are your experiences, good or bad, when using it as a way to increase reach? Let me know in the comments below!


portrait-blog.jpg

Andrew Macarthy is the author of the #1 Amazon Web Marketing Bestseller, 500 Social Media Marketing Tips, available for Kindle and in paperback. 

Buy 500 Social Media Marketing Tips 

AmazonUS: http://www.amazon.com/dp/B007L50HE6
Amazon UK: http://www.amazon.co.uk/dp/B007L50HE6

Follow Me:
http://www.facebook.com/500socialmediatips/
http://www.pinterest.com/andrewmacarthy
http://www.twitter.com/500socialmedia

http://www.youtube.com/500socialmediatips

The Facebook Passion Page Project Part 2: The Big Reveal


Welcome to Part 2 of the Facebook Passion Page Project, in which I take you along with me on a ride in an attempt to build and monetise a successful Facebook Page. If you missed Part 1, do check it out here, as you'll learn about my reasoning for starting a Passion Page, and how they can be useful for any business or marketer. Now, though, it's time for the big reveal!

Exercise Motivation Quotes 

exercise-motivation-quotes.JPG

My Passion Page is Exercise Motivation Quotes . I deliberately kept the subject matter completely separate from my social media marketing "niche" so that there would be no audience crossover and so I could judge the progress (or lack thereof) of the Page as fairly as possible.

The Exercise Motivation Quotes Page was launched on June 14th, 2013, and the idea behind it is simple: to post images overlaid with quotes to help fans motivate themselves to start, or continue, to exercise and be healthy. 

As you can see from the Page's first ever cover photo above, the branding is targeted towards women, as my research ahead of the project revealed females to be the most likely to post and share this type of content. 

Content Strategy

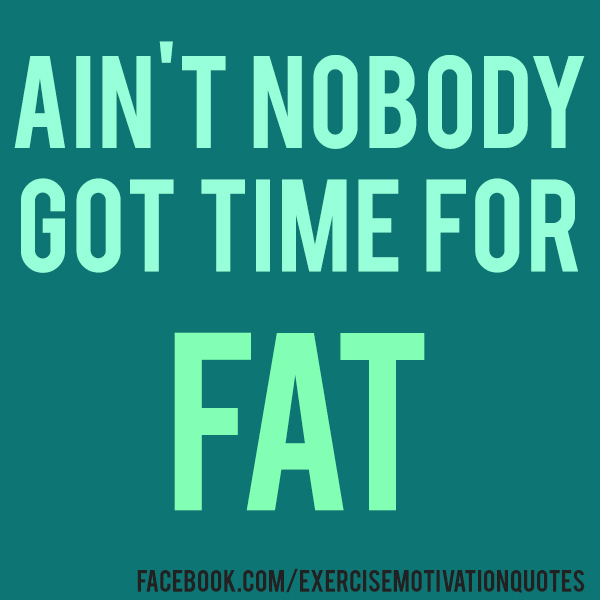
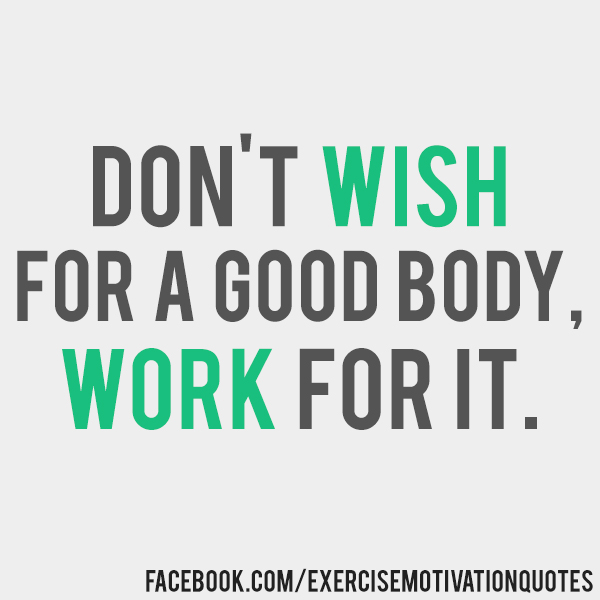
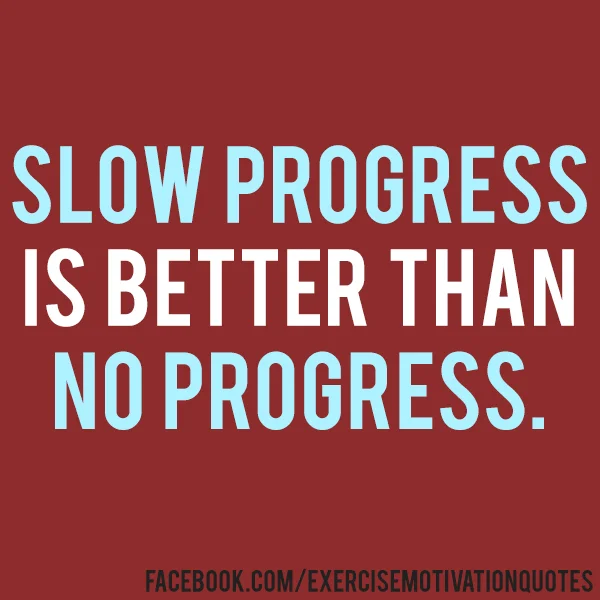
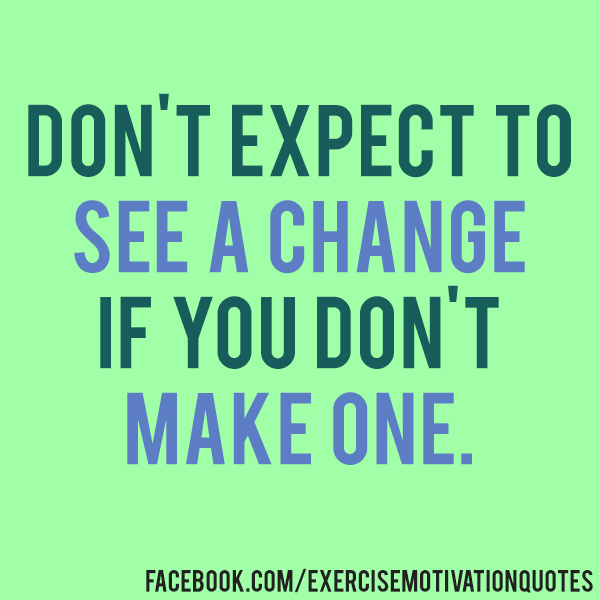
Any search for "exercise motivation quotes" or "fitspiration quotes" will return countless images that receive a lot of engagement on social media from people who want encouragement to keep fit. If I wanted a slice of this market for myself, I needed to create original content... preferably quickly, cheaply, and easily! I settled on the kind of stuff you can see above; knocked up in Photoshop in a matter of minutes, visually appealing, and very shareable. Each post contains a written quote, and is branded with the Page's Facebook URL.

At present, I post twice a day - once in the morning and once in the early evening, both times that people are likely to be thinking about exercise. 

Launch strategy

Other than a plan to post consistently, Exercise Motivation Quotes' launch strategy involved nothing other than purchasing just one cheap Facebook ad, encouraging women who list their interests as exercise to like the Page. 

fbad2.JPG

In around 10 days, I had spent just £22.50 ($36.50) and attracted 299 likes, enough to give the Page the kick start it needed. I have not spent any more money on promotion since.

Page growth and current statistics
Page Likes
June 14th 2013: Page launched
October 3, 2013: 3,386 fans.

     Post Reach
    Average post reach: 4,216.
    Average engagement rate: 7-9%

    Spend
    Ads: $36.50

    Earnings
    $0.00

    Profit
    -$36.50

    Coming up... 

    In the next part of this series, I'll talk about my initial steps into monetising Exercise Motivation Quotes. Will I lift the page out of the red and turn a profit for the first time? Make sure you subscribe via RSS or follow me on social media to be notified when the next blog goes live! 


    portrait-blog.jpg

    Andrew Macarthy is the author of the #1 Amazon Web Marketing Bestseller, 500 Social Media Marketing Tips, available for Kindle and in paperback. 

    Buy 500 Social Media Marketing Tips

    Amazon US: http://www.amazon.com/dp/B007L50HE6
    Amazon UK: http://www.amazon.co.uk/dp/B007L50HE6

    Follow Me:
    http://www.facebook.com/500socialmediatips/
    http://www.pinterest.com/andrewmacarthy
    http://www.twitter.com/500socialmedia

    http://www.youtube.com/500socialmediatips

    How to Auto Tweet Old Blog Posts on A Schedule for FREE | Auto Post Blogs to Twitter


    Why schedule and automatically tweet old blog content?

    If you want to continue to grow a steady Twitter following, encourage more replies and RTs, and  increase traffic to your blog, then posting regular tweets containing links through to your best content is a must. However, carrying out this work manually can be a laborious task.

    In this post, I'll show you one method of automatically posting a continuous stream of scheduled tweets containing links to your blog's best evergreen content; a method that ensures that your Twitter followers are given ample opportunity to check out the valuable content that you produce, and are reminded of it often.

    The whole process takes just a few minutes to do per day (or every few days, depending on how much you want to tweet), and won't cost you a penny. Let's get started!

    1. Sign up to Buffer

    The tool I use to schedule and post tweets to Twitter is Buffer. Head on over to https://bufferapp.com/ to sign up or sign in using your Twitter, Facebook, or LinkedIn credentials.

    Buffer has two main plans for its users. A free plan that allows you to schedule and publish up to 10 pieces of content per day (that's tweets in our case), or an "Awesome" plan for $10 per month that enables an unlimited amount of scheduling and an unlimited amount of posts per day. If you're like me, you'd rather save $10 per month in favour of sacrificing just a few minutes of your time every few days. So we'll take stick with the free option, thank you!

    2. Choose your schedule

    Once you're logged into Buffer and have added your Twitter account, click on the Schedule tab to choose when you want your queued tweets to be sent. You can choose to post tweets every day, or on individual days. In the example above, I have chosen to post one scheduled tweets at five points throughout the day. This ensures that I have a consistent (but not too spammy) feed of content being distributed, and that I catch as many followers as possible, who will be looking at Twitter at different times throughout the day.

    With an allowance of 10 tweets to schedule at any one time, this means that I will have to refresh the queue once every two days. Depending on how often you choose to post, you will need to do the same, or more, or less. Now, let's look at how to do it:

    3. Prep your tweets in a spreadsheet

    With a schedule set, it is time to prepare the tweets containing links to your awesome content, ready to upload in bulk to Buffer. In the context of this whole process, this step is likely to be the most time consuming, particularly if you have a lot of old (but still valuable) blog content that you want to share. 

    • Open up a spreadsheet - I'm using Microsoft Excel, but the idea applies to any similar program. In Column A paste in the text that you want to include in your tweet, including the link to your content.
    • Every time you publish a new evergreen blog post onto your site, add it to this document in the same format as above.

    4. Randomise the order of tweets

      Since Buffer will only allow us to schedule 10 posts at a time - whether that's 10 in a single day or spread out over a week - it is necessary to randomise your list of tweets every time you want to upload them to your queue, so that the same few tweets don't go out again and again. Over time, this will ensure even exposure to the tweets in your list. While the following instructions might look heavy, this process will only take you a few moments to do when you know how:

      • In Column C of your spreadsheet, type =rand()  to generate a random number. 
      • Highlight the cell containing the randomly generated number, hover your cursor over its bottom-right corner, click, then drag downwards to duplicate the creation of a random number against all of the rows (as pictured above).
      • Highlight all rows in Column C and copy them. Paste Special  as Values into Column B.
      • Delete Column C's contents.
      • Lastly, highlight all of the content in your spreadsheet and sort it by Column B.

      Here's the finished result, a random list of awesome tweets! Before you finish, delete the contents of Column B  (you don't want random numbers appearing in any of your scheduled tweets!) and then save the document as a .csv file.

      Always remember to randomise your list of tweets every time you need to upload more to your Buffer queue.

      5. Upload and queue your tweets

      The last step in the process is to bulk upload the list of tweets you have created in your .csv file.  For this, I use https://www.bulkbuffer.com/ (free at the time of writing). Click the "Let's get started" button, allow Buffer to authorise the app, and you're ready to go.

      To upload your file, simply drag and drop it from wherever it is saved on your computer over the "Drop a text file on me to import updates" box.

      When the tweets are in the queue, scroll down to the bottom of the page, click your Twitter account icon to confirm that is where you want the content to be sent to, then click the button below "Send to Buffer!"

      You will be provided with real-time confirmation about the status of your tweets being queued to buffer. Green means the tweet is sent and scheduled, while red means it has not. Failure to schedule will occur if you already have any more than 10 tweets already scheduled to be post. In the case above, I have 9 posts already scheduled to go for the next two days, so only one is accepted.

      When you return to your Buffer account and click on the "Buffer" tab, you will see the tweets that Bulk Buffer has scheduled for you, spread out according to the timings you set at the beginning of this process.

      And that's it! Just repeat this short process as often as is necessary (Buffer will even send you an e-mail when your tweet stash in running low). It shouldn't take more than a few minutes once you've done it a few times - and you'll maintain a constant flow of great tweets that old and new followers alike can enjoy. Don't forget to check on the progress of your Buffered tweets by clicking the Analytics tab from time to time, too!

      Do you schedule your tweets? Will you be giving the above method a go? Let me know in the comments! 


      portrait-blog.jpg
      Andrew Macarthy is the author of the #1 Amazon Web Marketing Bestseller, 500 Social Media Marketing Tips, available for Kindle and in paperback.

      Buy 500 Social Media Marketing Tips
      Amazon US: http://www.amazon.com/dp/B007L50HE6
      Amazon UK: http://www.amazon.co.uk/dp/B007L50HE6

      Follow Me:
      http://www.facebook.com/500socialmediatips/
      http://www.pinterest.com/andrewmacarthy
      http://www.twitter.com/andrewmacarthy
      http://www.youtube.com/500socialmediatips


      How to Embed A YouTube Playlist on Your Website or Blog

       
      how-to-embed-a-youtube-playlist-on-website-or-blog-video.jpg

      Playlists are a great way to group videos of a similar theme on the YouTube website, but their reach can be boosted by embedding them on your website or blog for whatever reason you wish. In my case, I place an embedded playlist above my YouTube "Subscribe" widget - you can see it at the bottom of this site's sidebar - to add some visual clout to the widget and encourage new viewers to click for updates.

      How to embed a YouTube video playlist 

      how-to-embed-a-youtube-video-playlist-step-1.PNG

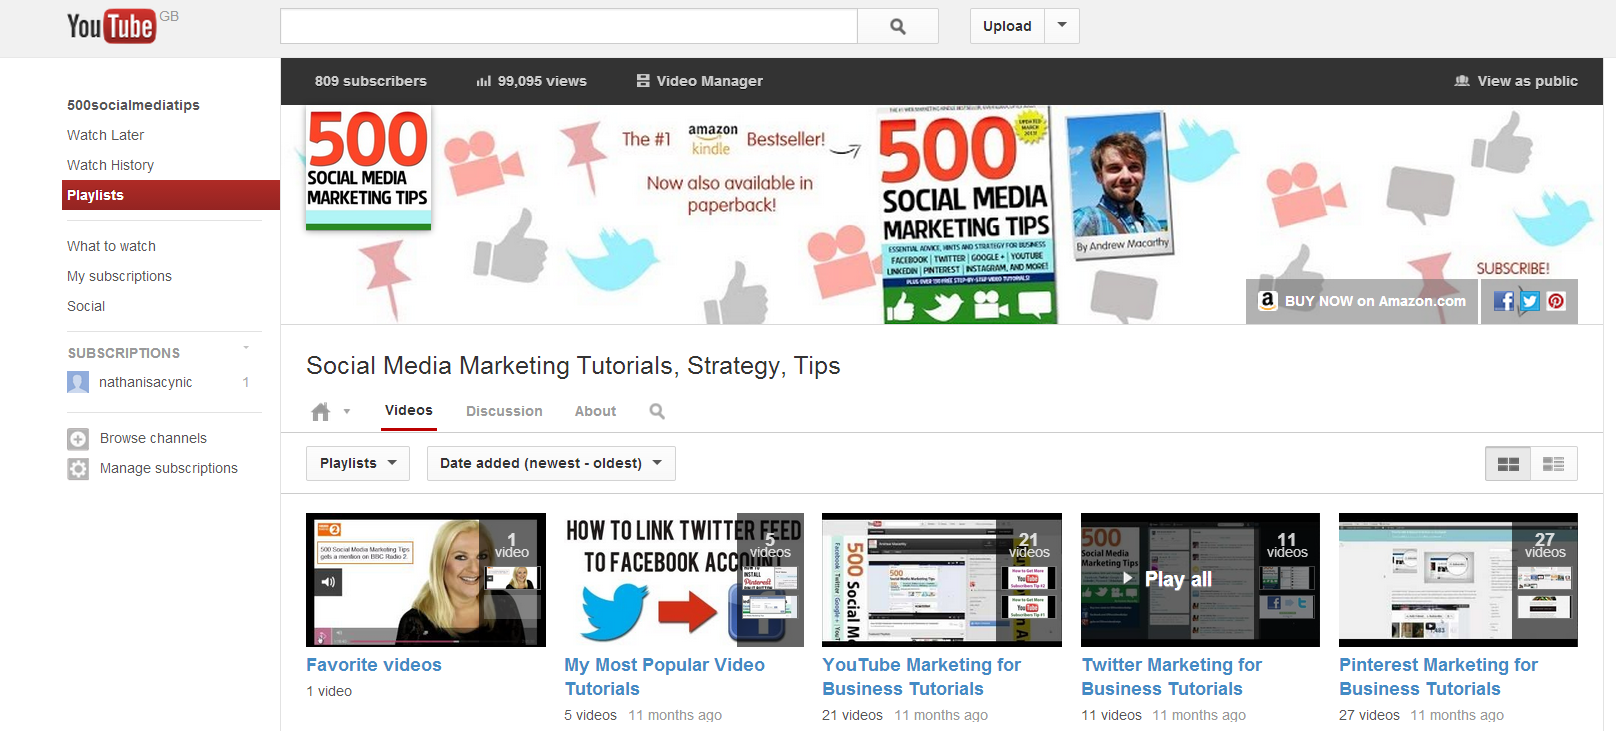
      1. On your YouTube account, select "Playlists" from the menu on the left-hand side. On the Playlists page (pictured above), hover over the group of videos you want to embed and select "Play all" if you want to add a whole playlist from the beginning, or click on the name of  playlist and select an individual video from which you want the playlist to begin.  

      how-to-embed-a-youtube-video-playlist-step-2.PNG

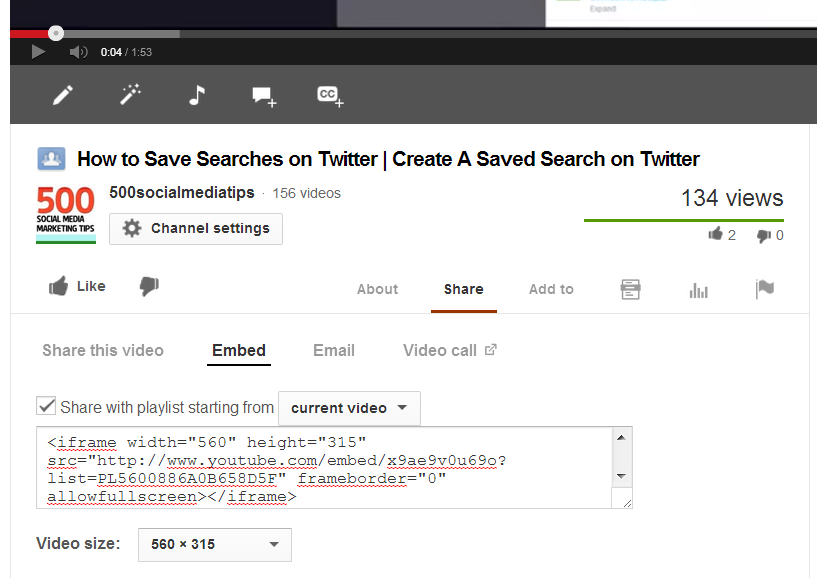
      2. On the video page itself, select the "Share" and then "Embed" tab beneath the player. Use the drop-down menus to choose whether you want to begin the playlist from the current video or from the beginning, and at what size you want the video player to appear on your website.

      3. When you're done, copy the embed code and paste it into the HTML on your website where you want it to appear, as I have done above.  That's it!


      Buy 500 Social Media Marketing Tips

      portrait-blog.jpg

      Slideshare's Hyperlink Clampdown: A Demo and Workaround Tips


      Slideshare is a fantastic tool for individuals and businesses to share ideas and reach an audience of many millions of people. And while the site enourages the publishing of insightful and helpful content, it looks now to be clamping down on those whose presentations don't quite share its priorities. As such, any links that appear on the first three slides of a Slideshare presentation will not be clickable. 

      As you can see in the hastily-created four-slide demonstration above, the hyperlinks I have placed on the first three slides are not clickable, but the one on the final slide is.

      In my book, 500 Social Media Marketing Tips , I recommend that Slideshare users include links in the opening slides of their presentations... not necessarily big, bold, and in your face, but at least given a presence in case a viewer takes notice but does not necessarily reach the end of the presentation. Better to have it appear even subtly than not at all! Placing it at the bottom of every slide, unobtrusively, is another alternatively. 

      Now that this change has rolled out, I would not change my advice, but do suggest that if you are going to feature hyperlinks at the very beginning of your Slideshare presentations, that the URLs are short and memorable. If your links is long and complicated and  not clickable, the chances of someone taking the time to type it manually into their browser's address bar is slim to none.


      Andrew Macarthy is the author of the #1 Amazon Web Marketing Bestseller, 500 Social Media Marketing Tips, available for Kindle and in paperback.

      portrait-blog.jpg