
The Ultimate Guide to Facebook Live Streaming Video for Business
/
At the beginning of February 2016, Facebook rolled out its live-streaming function to all users via its mobile app. Like Twitter's own Periscope, Facebook Live presents an amazing opportunity for businesses and entrepreneurs to connect with their fans, generate new and exciting content, and build strong and loyal relationships together.
In this blog post, I will teach you everything you need to make the most of Facebook Live - before, during, and after the live stream.
Before the broadcast
Starting a live stream on Facebook takes a matter of seconds, but for the benefit of you and your audience, a little preparation will make the world of difference. Here are some ways to be prepped and ready before you hit "Go live!".
Prepare your shot
Rather than holding your camera to your face for up to 30 minutes and to keep the shot still, invest in a cheap mobile tripod or simply prop your phone up against something like a stack of books. With your hands free, you'll be much more comfortable, relaxed and expressive. If you are going to be on the move outside, a selfie stick will help keep you in frame and reduce camera shake. Position your camera so that you are looking straight at your viewers; looking down into the camera, for instance, can be a little intimidating.
In addition to checking how you will look on stream, ensure that your backdrop is suitable, too. As the owner of a successful business, a background filled with dirty laundry and general messiness isn't going to reflect well on you. Think about lighting, too; not too dark and not too bright - your viewers do not want to be straining to see you!
Boost your audio
If you are in a relatively quiet room and the phone isn't too far away, its built-in microphone should be adequate enough to handle the audio of most live broadcasts. However, if the background is noisy (particularly if you are outside), a separate microphone is essential to ensure that viewers can hear you loud and clear. Your phone's own earphones may come with a built-in mic, which should be fine. Alternatively, similar items are available for purchase relatively cheaply.

A windy environment can quickly destroy your audio. To snuff the noise out, you can pick up a windscreen muffler, also known as a dead cat. For example, The Guttmann microphone windshield for iPhone is specially designed to reduce wind noise when recording in outdoor or adverse environmental conditions. It filters the noise to get a clear recording; fantastic for outdoor use.
Ensure you have a good Internet connection
To give your fans the best viewing experience possible, i.e. not blurry or stuttery, having a strong Internet connection before you broadcast is a must. Ideally, a 4G or Wi-Fi connection is recommended. If your signal is too poor, the Facebook Live icon will be greyed out and you will not be able to broadcast. If circumstances mean that your connection might be patchy, let your viewers know to prevent them from becoming frustrated.

Note: If you start a broadcast and your signal subsequently drops, viewers won't be left in the dark completely. The broadcast will be paused and you will be prompted to move to increase your signal strength or re-connect to wi-fi.
Plan ahead (or be spontaneous)
The type of broadcast you intend to stream will determine whether you should plan in advance, or just go live when the feeling hits. There are pros and cons to both:
Fans who catch you streaming spontaneously will feel an extra tinge of excitement - you could be anywhere, be saying anything, who knows what will happen next? There are likely to be less viewers, so more of a chance to interact and build relationships.

Planned streams, (telling your fans ahead of time when you are going to broadcast live) is like creating event television. You have time to build anticipation through prior status updates, tweets, your newsletter, etc. an opportunity to tell people what you are going to be talking about. Prior planning means your broadcast is likely to be more structured, but less exciting in the "you-never-know-what-might-happen-next" kind of sense.
How to start streaming with Facebook Live
Ready to broadcast your first Facebook live stream? Here are step-by-step instructions and some extra pointers to help you along the way.
1. Choose the Facebook Live icon from the Update Status box

The Facebook Live symbol sits at the bottom of the status update window on the mobile app. No need to type any status at this point, that comes shortly afterwards.
2. The Facebook Live launch screen
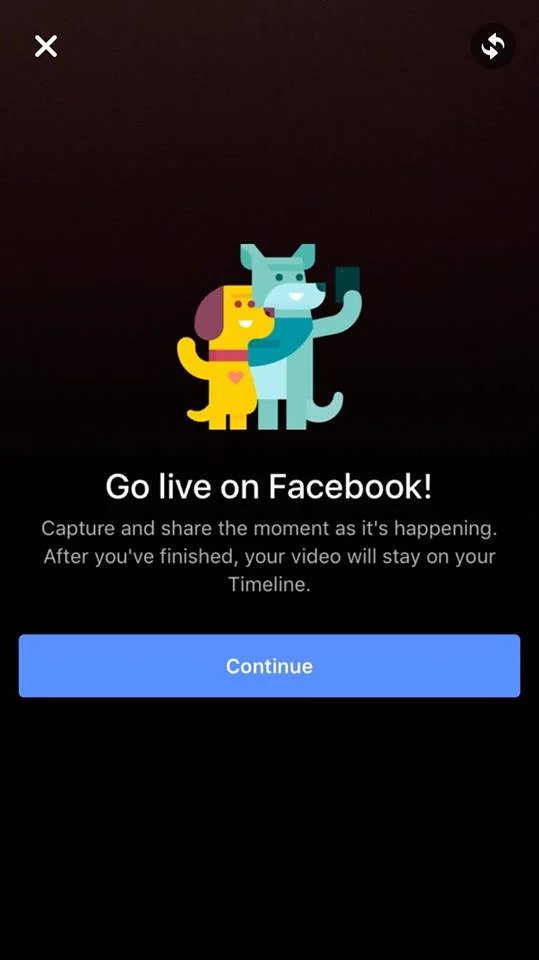
Use this screen to prepare your shot and choose between front or back camera to begin. When you're ready, tap Continue.
3. Add a tempting description
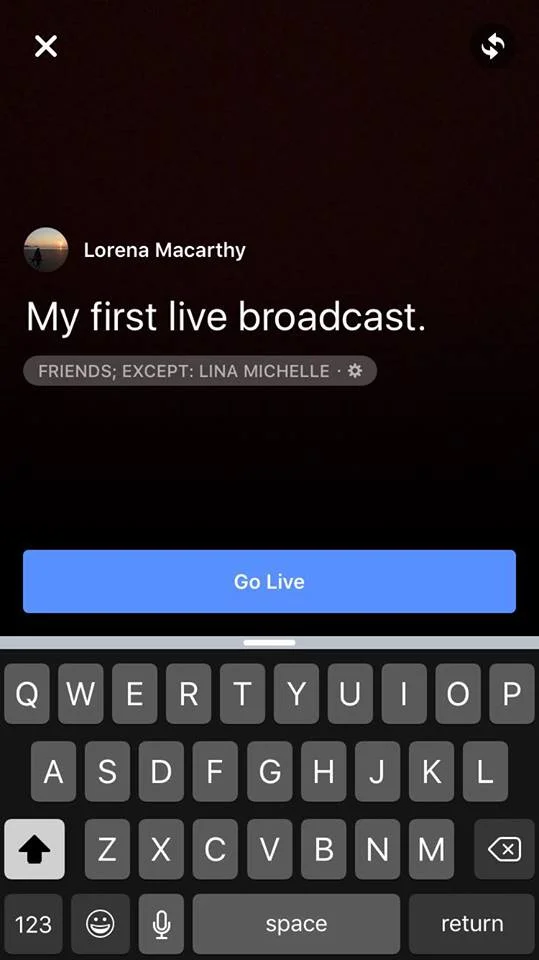
Use the text box to tell people what your broadcast is about, where you are, why they should watch, etc. This will appear next to it in the News Feed.
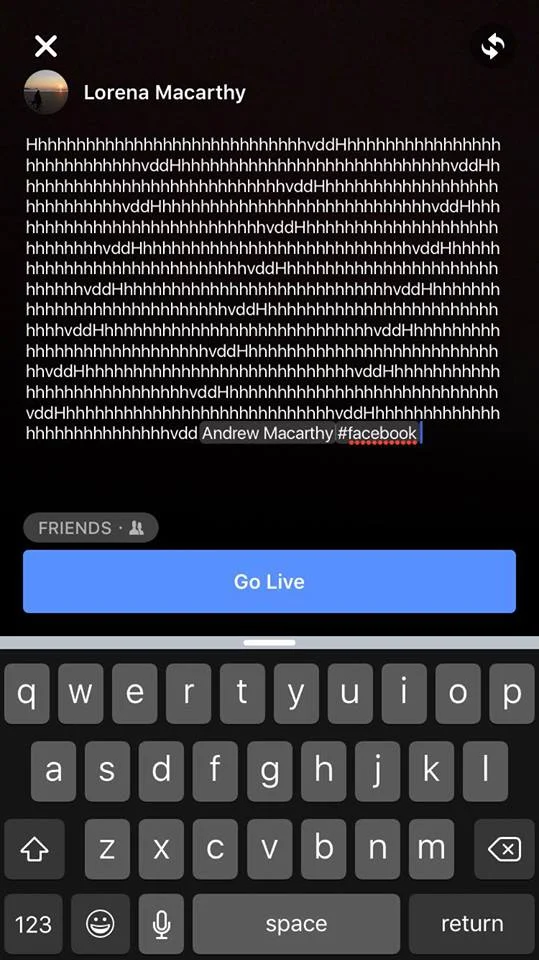
It may not look like it at first glance, but there is plenty of character space available for your description! You can also add hashtags and tag friends here, too.
4. Choose your audience

If you click on the cog icon below the description box, you'll see this menu, giving you the chance to tell Facebook who (or who not) can view your live stream. For the biggest audience possible, choose Public - which gives access to people whether they are on Facebook or not.
4. Publish and save your live stream
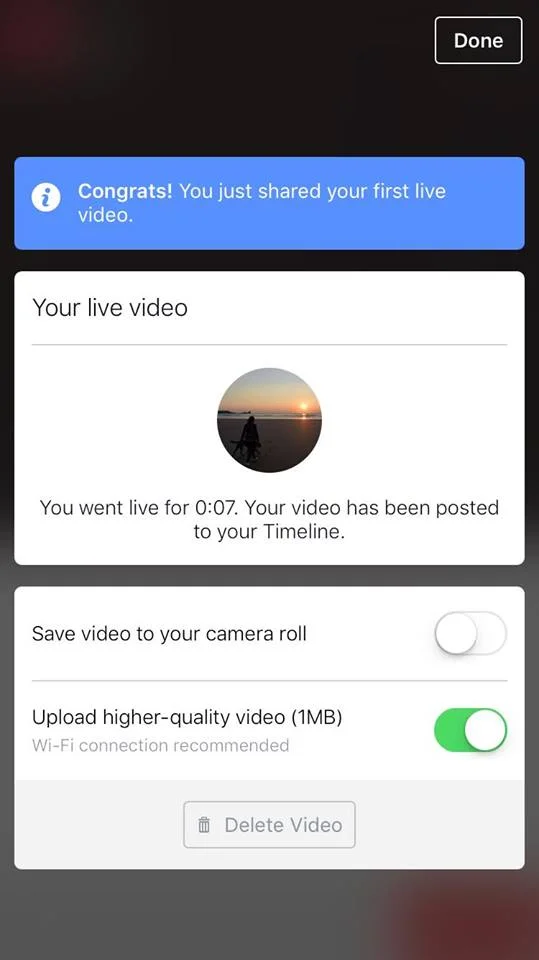
When your broadcast ends, it will automatically be posted to your Facebook wall, and into people's News Feeds. You also have the option to save the video to your camera roll (handy for uploading the live stream elsewhere, like YouTube, for more exposure). If you weren't happy with your recording or, for whatever reason, you don't want anyone except those who watched live to access it, then you can delete it here, too.
During the live stream and stream ideas
With your Facebook live stream in progress, here are some ideas to help gain viewership, mae your broadcast more engaging for current viewers, and keep them coming back for more!
Welcome your fans by name and interact live

You know that exciting feeling you get when a TV or radio announcer mentions your name live on air? It's the same feeling your fans will have when you interact with them during a live stream on Facebook. Welcome your fans by name, and take the time to answer questions from them as they appear in live chat.
Stream for at least 5 minutes - longer if you can

Facebook recommends that you plan to stream live for at least 5 minutes. Whether your broadcast is planned or unplanned, this will give more fans time to discover and share your video with friends.
Go live often and experiment with different types of streams
The more often you go live, the greater connection you will form with fans. Just like their favourite television show, many will make time to tune in if your broadcasts are held regularly. On top of this, experiment with different scenarios and formats to find out what best resonates with your audience. Ask them for feedback and ideas about how you can improve your offering. Here are a couple of different ideas:

Show exclusive offerings and behind-the-scenes insights into your business.

Share your expertise and field questions with a Facebook Live Q&A session.

Offer exclusive products and deals, revealed only to those people who join you for a live stream.
Encourage fans to subscribe to your broadcasts
When you are streaming live, viewers will see a Subscribe button at the bottom of your video. Be sure to remind them to tap it, as this will provide them with a notification the next time you go live: "Hit the subscribe button to be notified the next time I go live!" The Subscribe button also appears in the video of the broadcast that is available after you have finished streaming.

Re-cap for new viewers
Unlike a traditional video, viewers who stumble across and join your live stream part-way through might feel a little bit lost, especially if you are in the middle of a long discussion point. Keep an eye on the viewer numbers rising, and when you have covered so far.
Remind fans that they can watch the broadcast again
Unlike Periscope, whose live streams have a shelf life of just 24 hours before they are erased forever, Facebook Live videos, published to the site, can be watched for any length of time after the broadcast has ended. If you covered a lot of ground in your 30-minute stream, be sure to remind viewers that they can re-watch the video afterwards.
After the broadcast
The end of your live stream is just the start! Let's look at some strategies for giving your recording the most exposure possible.
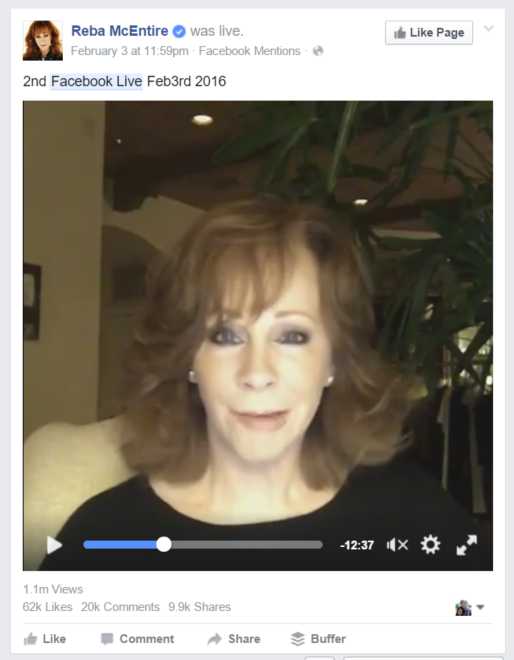
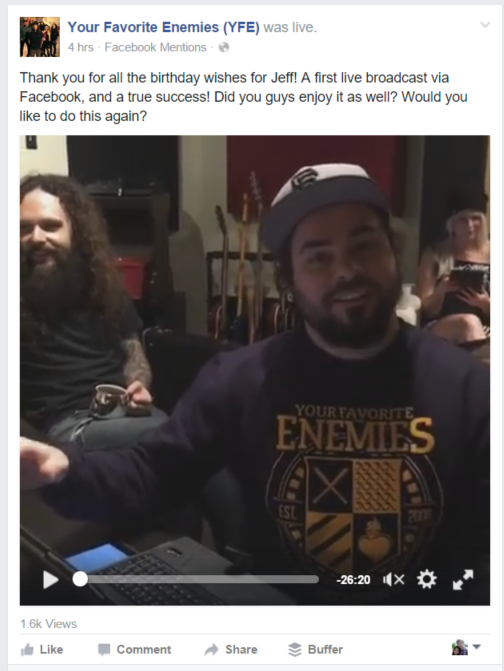
Edit the video description to add time stamps and more info
After your stream has been posted as a video to your News Feed, you will be able to edit the description of the post. If your video is long (and important elements dotted throughout), use this as a chance to add timestamps (like in the image above), and other information. This gives people a quick way to jump to parts of the video that will interest them most. The chances of anyone watching a 30-minute long video on Facebook (if your stream reached that length) are slim, even more so if they're left to skip through it randomly to find the unmissable elements.
Share the live stream video to your Facebook Page
At the time of writing this guide, Facebook Live is only available on personal profiles and verified Facebook Pages (those with the blue tick on the cover photo, often owned by celebrities or other public figures). For most businesses, while you'll have to initially host a live stream on a personal profile, there's nothing to stop you from sharing it to your business Page afterwards.
Note: Until Facebook makes Live available to all Pages, if you are not comfortable with sharing your personal profile with fans to catch your broadcasts as they happen, consider setting up one used solely for live streaming.
Pick out highlights and re-purpose on other social networks
When a broadcast is over and the live stream video is saved to your phone's Camera Roll, you have ready-made content to share on other social networks:
- YouTube: Upload the whole stream if you must (adding time stamps in the video description), but if it is long, consider editing out the fluff to make the video more appealing to watch.
- Twitter and Instagram: Pick out shareable 15 and 30-second soundbites. Use the accompanying text to anchor the point being made, and to promote upcoming live streams.
Analyse your video performance (re-upload to your Page for detailed insights)
When your live stream is happening, you'll be able to see how many people are watching at any one time. Once the stream has ended and is published on Facebook on a personal profile, you'll be able to see how many views, likes, and comments it receives.
By re-uploading the video to your Page (not simply sharing), you'll be able to access much more detailed video analytics through Facebook Insights. Use these to study who is watching, how long for, and whether what you are doing is resonating with your audience. If it is, fantastic! Keep it up. If not, re-watch your stream to work out why people might not be engaging as you wish, and work on improving your performance in future broadcasts.
Over to you
Will you be experimenting with Facebook Live as a way to interact with your fans and followers? Do you have any more tips and tricks for making the most of the app? Let me know in the comments below!

Andrew Macarthy is a social media consultant and the author of the #1 Amazon Web Marketing Bestseller, 500 Social Media Marketing Tips.
Buy 500 Social Media Marketing Tips
Amazon US: http://www.amazon.com/dp/B007L50HE6
Amazon UK: http://www.amazon.co.uk/dp/B007L50HE6
Follow Me:
http://www.facebook.com/500socialmediatips/
http://www.pinterest.com/andrewmacarthy
http://www.twitter.com/andrewmacarthy
http://www.youtube.com/500socialmediatips
Pin this article!

The Ultimate Guide to Facebook Live Streaming Video for Business